Please welcome our guest writer, Ronald Wolf.
I love to visit my grandmother because she lives in one of those old apartments, and she’s a collector of various stuff – from post stamps and napkins to porcelain figures and unusual lamps.

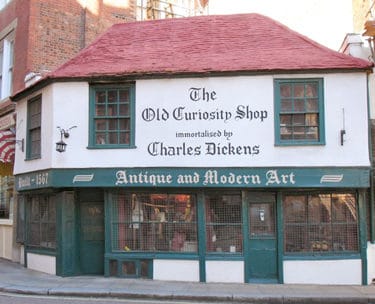
There is some magical nostalgia in the air like you’re in the middle of the curiosity shop from Charles Dicken’s writings.

Almost one whole century resides in this apartment (for his tenant is close to her 85th birthday), and my dear grandma has never in her life thrown anything out.
Old Curiosity Shop
As you can imagine, the apartment became pretty crowded, but she easily found a ‛solution.’ To my utter amazement, that ‛solution’ was to turn one of the spacious rooms into a ‛garbage dump’ for a large number of these beautiful objects.
I couldn’t bear the sight so I proposed to build a walk-in closet that could take care of her clothes and shoes and free the space for the ‛important stuff.’

She said that I could do whatever I like as long as I don’t get ‛those filthy handyman’ involved.

Grandma wasn’t thrilled with me because she thought that she doesn’t need it, so when she said that I could do whatever I like, she also meant – with my own money. That made a new goal in my ‛mission’ – to make the perfect walk-in closet in the limits of my very modest budget.

Walk-In Closet

Preparation


First I had to find the perfect location. Most people think the location should be chosen just according to the size of space, but you should be aware that you might also need a permit for some area.

Luckily I became aware of these permits long ago because, as I already said, this apartment is very old and every time my parents wanted to make some change (in modernization sense) they had to check if they’re allowed to execute it. So I knew exactly for what parts of the apartment permits are not needed ( you should always contact your city’s building department if you’re not sure).

Try to find a space that won’t require any demolition (for me that wasn’t even an option because good ole’ granny would have a heart attack). If there is no other way, just make sure you won’t be cutting through load-bearing walls. Besides the danger factor (the ceiling falling on your head, for example) this mistake is very hard to fix.

When it comes to the measurement, there is a ‛holy trinity’ you need to stick to – floor to ceiling height, back and side walls that represent the usable space, and the depth of the closet. This measures will dictate the amount of hardware and shelving you’re going to need, their depth, and the upgrade options.

Level Up


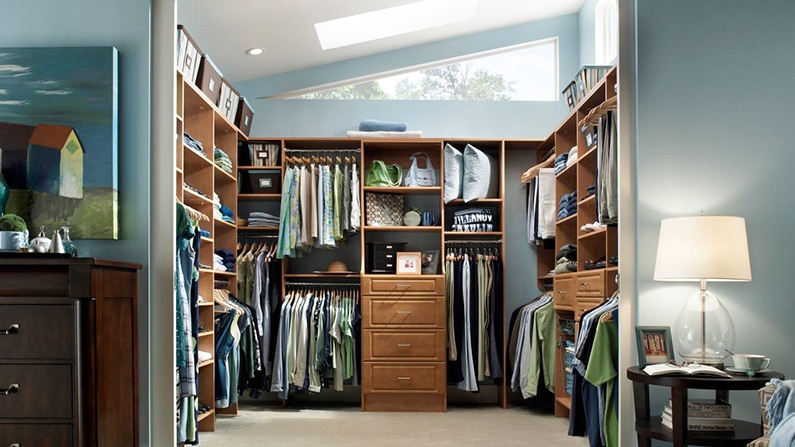
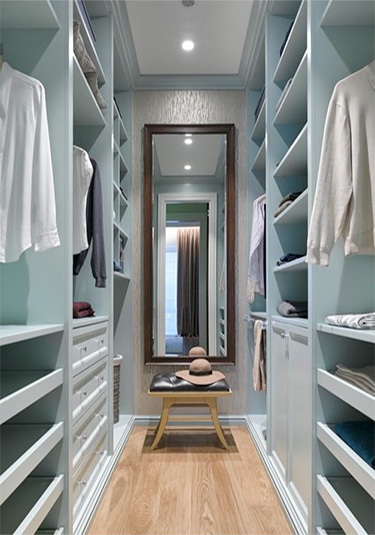
This is the part when everyone’s closet becomes different via optimization that will satisfy personal needs. You have to decide about things that are connected with how you’re going to use your space – folding or swinging doors and what kind of storage options (shelves, cubbies, hooks). There are no rules and all these things are up to you to decide, depending on what are you planning to store inside.

DIY Walk-in Closet

I already decided to store all of granny’s clothes and shoes, in order to free other beautiful vintage oak closets for the peculiarities piled up in the next room. It is always good to check, so I waited for her regular ‛walk time’ and made a list of things.

When you’re calculating the space for desired items a rule of thumb (one inch per item) will do the job but keep in mind that seasonal coats and other bulky items will need a little bit more room (up to two inches). Of course, in the end, I realized that some things just wouldn’t fit inside, and I used a characteristic of senior citizens – forgetfulness – to get rid of them. No, I didn’t throw them, I just placed them in storage.
If you’re looking for a reasonably cheap and effective storage in Sydney I can tell you that Super Easy Storage (the company I’ve used in this case) has professionals that will make your belongings safe and secure in no time (it was literally done in half an hour during granny’s walk the next day!). This way she got to keep all her prized possessions, but out of sight. And if she ever suspects something missing I could order it back in no time (minus the dust, of course).

After I decided on the design, I just made a rough sketch and used tacks and strings to try the desired layout option. Then you just measure the strings and – voila – that are the dimensions you’ll need. In order to get the full potential of your closet, you can create a double-hinged space – tops up top and bottoms below.

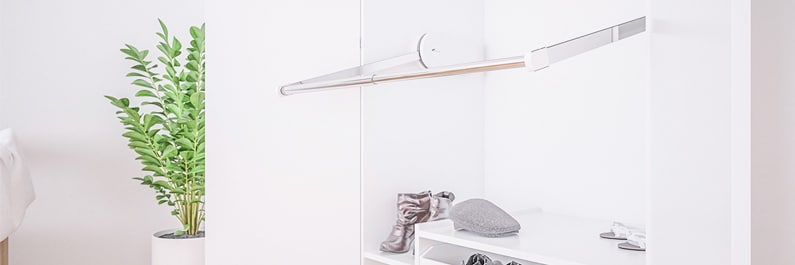
God knows I had to do it and I also had to install a fold-down wardrobe lift because my granny is cutely short (just like Dickinson’s characters!) and she wouldn’t be able to reach long-hang space without it (if you can, place this space no more than seventy inches from the ground).

Fold-Down Wardrobe Lift
The last step of the preparation process is to find the studs nearest to your dimensions on the wall you’re going to use. This is very important because you’ll anchor your new walls to them. Mark them with pencil, and later you’ll place your boards following these lines.

Getting all together


I sat down and made a list of things for my trip to the Home Depot: boards (2×4, plywood, the quantity depends on your layout design), nails (16D in my opinion), sandpaper (120-grit will do the job), stud finder, level (you don’t want a ‛drunken’ closet), framing square and tape measure (it’s good to have both), carpenter’s pencil, drywall, door, paint.
Then I looked up for the tools I need. Basically, only a screwdriver and a circular saw. I managed to find a usable screwdriver, but I had to purchase circular saw. It is a very important and frequently used tool, so I spent some time to find a quality circular saw for a reasonable price.

First I made header and footer plates – you just need to cut two of your boards to the length of the first wall you’re constructing. Then I used the tape measure and marked the stud spacing on both boards – just remember that the center of each stud must be sixteen inches from the center of the next.

Next was the height of the wall, which was basically the same -cut the boards in the right length for the number of studs you’ll need, and don’t forget two additional studs as end caps.

In the end – nailing: one stud at each end of the future plate and header plate on the top. And that’s it – just repeat the steps for each wall you want to build.
Like the wall with the door, it’s pretty much the same – I just marked the space for the door on the footer plate and skipped the studs in the door space. The nailing is same as above. You just need to make a door header by cutting the board in its width and place it across the gap at the top.
Quality Circular Saw For A Reasonable Price

When raising the walls, I just had to make sure they’re standing straight (using the level). You lift the wall and nail it to the end stud at equal distance (I did it on every two feet). The last thing is to anchor them to the ceiling and floor, which I did simply by liberally nailing between studs along the header and footer plates.

Finishing touches


And I was done.  Once I’ve put inside the storage options I’ve chosen, hanging the drywall and installing the door was a piece of cake. The painting was fun because I treated myself with a great handheld sprayer and even granny gave it a try. It turns out that she needed a walk-in closet after all.

As you could see, the preparation is the main thing. The very building process goes smoothly if everything is prepared accordingly, and there are a lot of tutorials on the net that can give you a visual watch-and-repeat guide.

Toolnerds logo

Ronald Wolf

Guest Writer
Although law and business are Ronald’s expertise, he knows a lot about home improvement as he worked with his father during summer breaks at his construction company in Australia.