Using a range of painting techniques is the ultimate way to inject color and life into a tired and world-weary room.
It’s also faster than using wallpaper — especially when using a paint sprayer — and as it offers a greater degree of customization, you can change the coating surface color, finish, and design to suit your personality.
The average U.S. house has appreciated in value nearly 60 percent in the past nine years — redecorating time-worn areas is an excellent way to give your home serious curb appeal, make it stand over and above your neighbor’s, and provide its value an additional boost.
But, what if you have different surfaces to work with? You’ll need different painting techniques for each one!
Read on, buddy, to learn eight astounding techniques to transform your home today.
1. Color Wash Interior Walls

Have a smooth, drywall (plasterboard) living room wall that needs updating? Color washing — also known as faux painting — is perfect for achieving subtle, aged effects while adding an eye-catching hue and texture. You can even use it on just one area to create an accent wall.
- Start with a base color of latex and allow it to dry — for even and rapid coverage, I suggest completing this stage with a dense paint-compatible sprayer, such as the Wagner FLEXiO 5000.
- You can use as many additional hues for color washing as you wish — although most guys use just one more coat on top of the base. However, always try to keep them in the same tonal range, otherwise, they’ll clash and make the wall an eyesore.
- Choose your latex color wash to put on top of the base coat, and mix in a five-gallon bucket with latex glaze. Follow the manufacturer’s instructions for the ideal ratio — although, as a rule of thumb, it’s typically four parts of latex to one of glaze.
- Immerse a rag or sponge into your glaze/latex mix — a rag provides a gentler wash, while a sponge delivers a textured appearance.
- Douse the wall with the mix in a criss-cross manner — feathering out any excessively dense areas with a soft paintbrush.
- Keep dipping and crosshatching until the entire wall is covered.
2. Apply Masonry Paint to Exterior Walls
Color washing may be eye-catching — but it doesn’t have the hardcore durability to withstand the challenges of wind, sun, and rain — you need masonry paint. Here’s the method:
- As most exterior wall paints are water-based, ensure you not only choose a day for painting that’s dry but also one where no rain is forecast for the following day.
- Unless you live in a remarkably small property, it’s unlikely that you’ll complete your exterior painting project in just one session. Hence, divide your wall into manageable sections that you can finish in each bout. I suggest using drainpipes or windows as boundaries.
- Protect external plumbing, wall hardware/furniture, and window frames with masking tape, old newspaper, and poly sheeting.
- On flaking walls, first, rub down with a stiff brush to remove any loose render — ensuring you wear a protective mask to protect you from dust.
- While you could use a paintbrush or roller to apply the medium, on projects of this scale, you need a dense paint-compatible sprayer such as the HomeRight Power Flo 2800.
- Work from top-to-bottom, overlapping each pass by around 30-50 percent.
- For a detailed guide on exterior house painting, and to see the ultimate machines for rapid coverage, check out my article on External Paint Spraying.
3. Bricks Need a Different Approach

Painting masonry is straightforward, as you have a relatively flat base on which to apply your coating medium. However, bare bricks demand a slightly different painting technique to achieve a satisfying result.
- Clean the bricks using detergent, water, and a stiff brush. If you’ve got a large expanse of bricks, I recommend utilizing a power washer.
- Allow to dry.
- Coat the walls with acrylic sealer using a thick-paint-compatible sprayer, such as the Graco Project Painter Plus. This will prevent brick flaking, shield from moisture ingress, and guard against mildew.
- If this is an interior wall — you may wish to finish the project at this stage for a Manhattan apartment look. Alternatively, if you’d rather not have an exposed brick appearance, or you’re addressing an outside wall, you can then apply a colored latex paint — again using your paint sprayer.
- For more tips, check out my guide on Painting With Thick Mediums.
4. Vary Your Painting Techniques for Garage Walls
The inside of your garage is a two-headed beast — it’s not an exterior wall, nor is it inside your home. But whether you call it your man-cave, workshop, or Fortress of Solitude — it needs a particular approach to give your refuge a new lease of life.
Buddy, ditch the girly satin-sheen and eggshell paints and opt for manly acrylic latex paints intended for exterior use. Not only are they resistant to mold, mildew, and water ingress, but the binding polymers allow the paint to be easily cleaned of oil and detritus
- Move your car, power tools, gym gear, or whatever valuable equipment resides in your garage outside — you don’t want it covered in paint.
- Remove fixtures and fittings where possible — such as pegboards, hooks, electrical sockets, and vices. If immovable, use polythene sheeting and masking tape to protect these areas.
- Cover your garage floor with drop cloths. Fill any holes in the walls using vinyl spackling and utilize painter’s caulk in cracks or seams. Sweep the walls to remove dirt and cobwebs.
- If you’re painting the ceiling as well as the walls, start with this high-level area.
- Use an acrylic-compatible sprayer to deliver the coating medium — such as the Graco X5.
- Paint the walls from top-to-bottom, overlapping each pass by about 30-50 percent.
- On edging, I recommend using a paint shield or guide wheel.
For a detailed 101 on garage painting, including addressing the floors, I suggest you check out my Painting a Garage Interior Article.
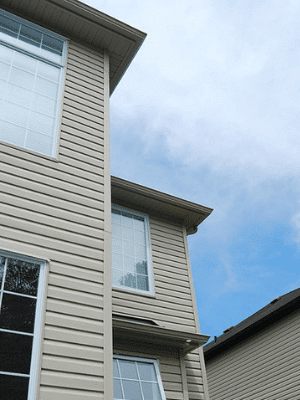
5. Liven-Up Your Vinyl Siding
 Vinyl siding is an excellent way to cover the exterior of your home — it requires little maintenance, and its quality has seriously improved over the years.
However, like my wife’s once good looks, it doesn’t last forever. Instead of replacing it, you can use a coat of paint to liven up faded vinyl, or just change the hue.
It’s a good idea to paint in mild temperatures — ideally, low humidity and an overcast sky, meaning that the coating medium is unlikely to crack or flake. Ensure you choose a paint that incorporates urethane resins — as they allow the fresh coat to create a firm bond with the vinyl siding.
I strongly recommend that the hue color you select isn’t darker than the current tone — dark colors absorb heat, which can cause premature warping of the base material.
Always thoroughly clean the vinyl before applying the paint. As this material has been exposed to all the challenges that outdoor life can throw at it, it’s likely to have a sheen of dust, debris, detritus, oil, and dead insects. Use a sponge with water and a gentle detergent.
It’s another large-scale project, hence using a power painter is crucial if you want to finish the job before it rains. Ensure the unit is urethane compatible, such as the Earlex Spray Port 6003.
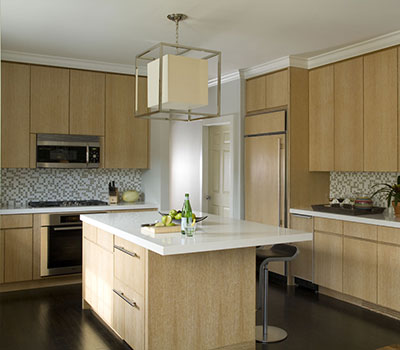
6. Renew Your Kitchen Cabinets With Paint

If you’re bored with the look of your kitchen, you don’t need to install a new one — simply repainting the cabinets can recoup around 80 percent of its value.
- Take all of the doors off the cabinets, and pull out the drawers.
- Remove hinges, handles, and hardware to protect them from wayward paint splatters.
- Clean the surfaces with mineral spirits and a soft sponge, and allow to dry.
- If required, add a priming coat. For both the primer and the stain or enamel, I recommend using a handheld sprayer, such as the Wagner Opti Stain Plus.
- Always apply the paint with the grain. For a novel, shabby-chic appearance, consider creating a color wash as outlined in Technique #1.
- When completely dry, reinstall the hardware.
For the ultimate guide on cabinet respraying, and the most effective power painters to create the perfect finish, check out my 101 here.
7. Update Your Wood Paneling With a New Paint Job

Like kitchen cabinets, wood paneling can soon look dated or faded. Use these painting techniques to easily change their appearance.
- Always clean the paneling first with mineral spirits.
- Use a wood filler to make good holes or cracks.
- Where paneling meets the baseboard, add a little painter’s caulk to seal any gaps.
- Utilize 100-grit sandpaper to level out the filler and to remove the existing sheen. This helps to create a strong bond between the new paint coat and the timber.
- Clean again with spirits to remove any sanding dust.
- Coat with varnish, stain, or shellac using a compatible sprayer — such as the Wagner Control Spray Double Duty.
If you’re serious about reinvigorating your wood panels, head over to my complete Guide to Wood Spraying.
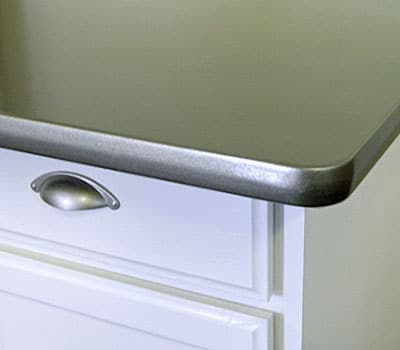
8. You Can Even Paint Stainless Steel!

Stainless steel offers many advantages, not least its strength and durability. But it’s not a homely material, and you might want to warm up these cold surfaces.
All the painting techniques we’ve used so far won’t work on steel, as most coating mediums will not adhere to perfectly smooth metallic façades. Hence, read on for my top tips.
- Run a wire brush over the stainless steel to add a little texture. If it’s still relatively new, use an orbital hand sander — ensuring you wear safety goggles at all times.
- Use a water-based degreaser to clean the surface — you might need a specialist steel cleaner if you have to tackle baked-on grease.
- Apply an oil-based primer to create a base to which your topcoat will adhere. Since most stainless steel paints incorporate solvents — a waterborne primer is not suitable.
- The most common coating medium utilized on metal is epoxy — as it creates a wipe-clean surface and is resistant to chipping. And while a paint sprayer will create an unrivaled finish — the dense nature of this paint can be problematic for many DIY units. I recommend an epoxy-compatible unit, such as the Wagner Control Pro 150.
- For more info on epoxy sprayers for steel — check out my complete guide.
Conclusion
So there you have it!
Eight different painting techniques to suit different surfaces. Now your only dilemma is figuring out which one to try first.
Have any burning queries? Need anything clarifying? Or maybe you have your own tips and tricks for painting? Feel free to shoot us your message!


