
Staring at your multimeter — you’re in a state of complete bewilderment. I know that sometimes the complexity of the multimeter symbols can stop you in your tracks.
Although it might look like it at first, multimeter symbols aren’t hieroglyphics.
In fact, they’re pretty simple to understand once you master the basics. Multimeters are an affordable way to ensure you’re getting the most exact measurements possible.
In this post, we’re going to give you a quick yet comprehensive rundown of how to read multimeter symbols, so you can measure and master your next project with ease!
What Is A Multimeter?
Essentially, a multimeter is an electronic tool that measures current, voltage, and resistance, and in some models, temperature. You may also have heard them referred to as ‘multi-testers.’
These versatile machines include general home-use examples, automotive-focused units, and industrial-grade HVAC (heating, ventilation, and air conditioning) tools.
There are two main types of multimeters — analog and digital. Both measure current in amps, resistance in ohms, and voltage in volts. Analog meters use a needle to render measurements, however, today most people use digital versions as they deliver elevated accuracy. For more info, check out my guide to the Different Types of Digital Multimeters.
Before we get into more detail about how to read multimeter symbols, first we want to make sure you know the four main parts of the multimeter itself. They are:
1) Display — This is the screen where you read your measurements.
2) Buttons and Sockets — Depending on the type of multimeter you choose, you’ll have different options and positionings.
3) Dial/Rotary Switch — This is where you select the unit of measurement.
4) Input Jacks/Ports — These are the places that you insert the test leads — insulated wires that connect the multimeter to the object you’re testing/measuring.
For hints and top tips for newbies to multimeters, take a look at my Beginners Guide.
OK, So How Can I Read My Multimeter Symbols?
Fluke multimeters are one of the most popular brands of testers for both home-users and pro-level electricians. Luckily, the multimeter symbols they use are also the standard for machines from other marques — so, these are the graphical representations I’ll explain in this article.
Note: On some multimeter models, you’ll notice that there are additional, yellow symbols around your rotary switch/dial. If you need to access these, make sure you press the shift button — just how you would on a computer keyboard.
Without further ado, let’s break down and decode the most important multimeter symbols.

Share this Image On Your Site

The Hold Button
This is especially helpful if you’re doing a project that requires you to keep an exact measurement at your fingertips. It’s also a great feature if, during testing with the probes, you can’t immediately read your multimeter due to an awkward or dimly lit location.

AC Voltage
This multimeter symbol is identified as a capital ‘V’ with a wavy line above it, akin to an accent mark in the Spanish language.
Likely, this will be the setting you use to take electronic measurements of alternating current machines — such as kettles, fans, Christmas lights, and televisions. It displays the voltage of your equipment or mains supply.
Usually, you should expect to see readings between about 100-240 Volts. I’ve put together a handy 101 on checking AC voltage here.

DC Voltage
This is the setting you’ll use when you’re measuring smaller circuits that run off direct current — such as batteries, cells, and even indicator lights.
Continuity
That’s because the multimeter emits an audible beeping noise when it detects a complete circuit. It’s a straightforward and awesome way to check for connection problems in electrical tools and toys.

Direct Current
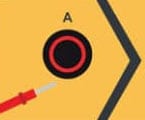
Current Jack

Common Jack
The port where the black lead must only be used.

Range Button
This button will usually be found at the top of your multimeter and has a ‘Lo/Hi’ symbol above it. It will help you click through different meter ranges.
While today, a great majority of multimeters — such as the Fluke 117 — have auto-ranging, you can also choose a specific range on some models – like switching from ohms to megaohms.

Brightness Indicator
It’s identifiable by — you guessed it — a small drawing of the sun.

AC Millivolts
Switching to millivolts will help you to get a precise and more accurate reading.

DC Millivolts
Like the AC millivolts function, it’s utilized for precise measurements or in circuits where the voltage is minimal — however, it should only be used on equipment that uses direct current, such as power from cells and batteries.

Ohms
No, you’re not chanting this as a Buddhist yoga mantra. At least, not when you’re reading multimeter symbols. It looks like the Greek letter Omega, and it helps you establish the most accurate resistance reading possible.
Want more? This button can also help you to figure out whether or not a fuse has blown. If your meter displays ‘OL’, then the fuse has gone and needs to be replaced.
Note: Make sure you’ve taken fuses out of the circuit when you’re using the ohms setting on your multimeter. Whether you’re working on your own or with a team, over 100 electricians die every year from electrocution. Better safe than sorry!

Diode Test
It works by passing a small voltage across the diode and checking the resulting voltage drop. Though some people use the ohms setting to test them, this is a more accurate procedure.

Capacitance
Be careful — capacitors can deliver a nasty shock, even when disconnected from a power supply!

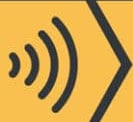
Alternating Current
Though you’ll usually need a clamp attachment to perform functions associated with this option, it’s a great way to investigate the current loads in AC circuits.
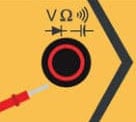
Red Jack
There’s a reason for this!
That’s because your red jack measures pretty much everything except for current. That means it can help read the temperature, duty cycle, frequency, resistance, and voltage, among others.
We know understanding multimeter symbols can feel like a chore at times, but thanks to this handy guide, hopefully, you’ve realized the process isn’t as stressful as you once imagined it was!

Figuring Out Multimeter Symbols Isn’t Rocket Science
…though we know for the uninitiated, it can sometimes feel like it.
However, now that you’re an expert, you’re probably ready to buy a tool of your own.
For reviews on some of the best multimeters out there, check out our top picks, and feel free to contact us with any questions. And, if you feel that any of your DIY buddies would enjoy this multimeter symbols article — please feel free to share.
Our Multimeter Top Picks
| IMAGE | PRODUCT | DETAILS | ||
|---|---|---|---|---|
Best under $100 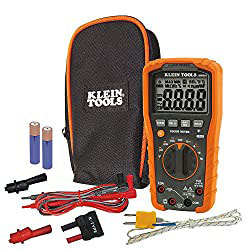 | Best under $100 |
| Check Price at AmazonKlein Tools MM600 Review Klein Tools MM600 Review | |
Best under $50 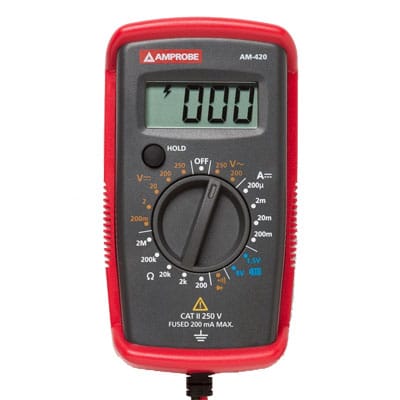 | Best under $50 |
| Check Price at AmazonAmprobe PK-110 Review Amprobe PK-110 Review | |
Automotive Multimeter 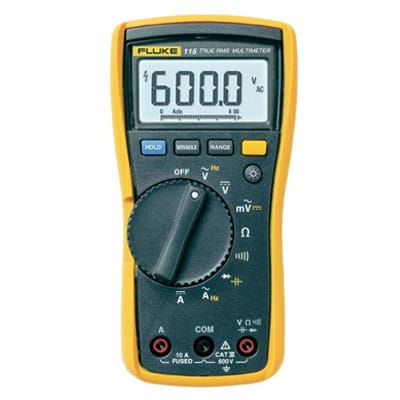 | Automotive Multimeter |
| Check Price at AmazonFluke 115 Review Fluke 115 Review | |
Best HVAC Multimeter 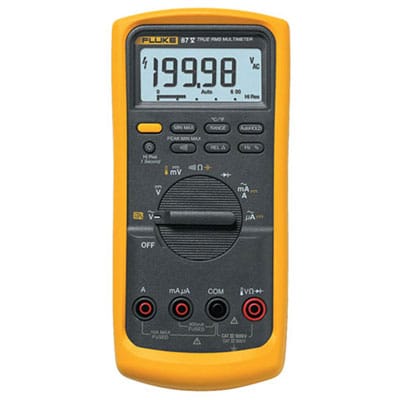 | Best HVAC Multimeter |
| Check Price at AmazonFluke 87-V Review Fluke 87-V Review |


