How to stencil on wood.
If you know how to stencil on wood, you can transform elements of your decor in a matter of hours. Bring your own unique personality to anything, be it a child’s chest of drawers or your kitchen cabinets. Stenciling is a simple process that you probably first tried as a kid. As an adult though, you may prefer sophisticated and intricate designs, whether you create your own pattern or choose a stencil template. From fleurs de lis to Ferraris, the options are endless. While stenciling is not complicated, you need to pay attention to the details if you want an end result that looks slick, and not like a kindergartener’s project! Thorough preparation is key, as are the right tools for the task. You’ll need suitable paint and a stencil-friendly paint sprayer. Let’s begin by looking at paint options.
How to paint a stencil on wood

Best Paints for Stenciling on Wood
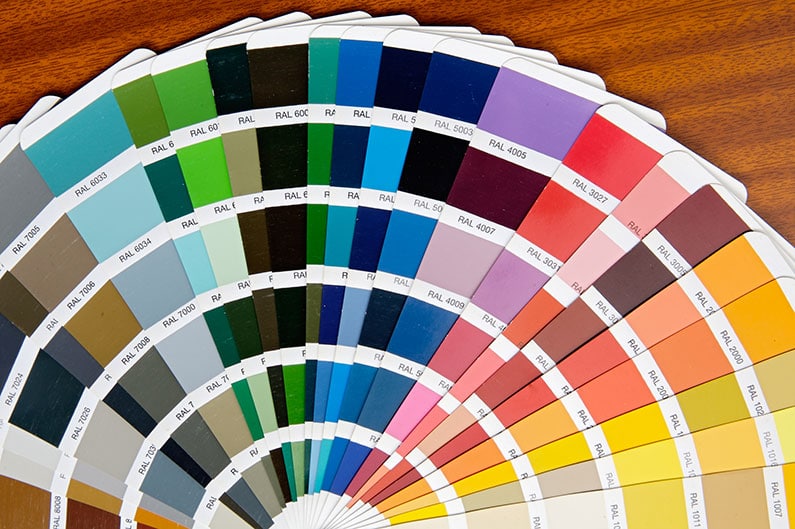
The best paint for this type of task will be a water-based latex or acrylic coating. You’ll also need to ensure that your coating is compatible with your paint sprayer (if you already own one. More on that soon). One of my favorite paints for stenciling on wood is Rust-Oleum Painter’s Touch Flat White Latex paint. Not only is it dry to the touch in just 30 minutes, but it also emits very little odor. As a quick word of warning, try to stay away from aerosol paints. While they look convenient at first glance, you’ll have no control of the pressure output and fan delivery you get with a paint sprayer.
Best paint for stenciling on wood

Choosing the Perfect Paint Sprayer

Your paint sprayer is a key tool in quality stencil application. Too big and it will blow your coating outside of the laser cut lines of your stencil. Contrastingly, if the spray gun is too small, it lacks the grunt to finely atomize paint particles, which makes it difficult to apply the thin coats required for stenciling.

If you look into airless devices, you’ll find that most operate at pressures around 3000 PSI, which is too high for stenciling. However, there are always exceptions to the rule, and the Graco Handheld 360 VSP proves it.

Falling into the unusual handheld and airless category of spray guns, this unit is small enough to cope with detail and touch up work. Plus it can operate at any angle and you can dial down the pressure as required.

Most high-volume, low-pressure (HVLP) machines are suited to stenciling. These spray guns reduce overspray and are a popular choice among DIYers and home improvers worldwide.

The Wagner Control Spray 250 is ideal for small to midsize tasks, and Wagner’s proprietary Control Finish fluid nozzle provides plenty of adjustability and control. This said, you will need to thin your coating before use.

It’s not only about power output though, you also need to consider the spray gun’s tip size to ensure it’s compatible with your chosen stencil paint.

If you’re not sure where to get started, you can find detailed information on tip sizes and paints here.

Choose a Stencil Pattern

Whether you’re surprising your wife with a lacy boudoir-ready cabinet or creating your son’s dream rocket ship bedroom, there are laser-cut stencils for wood available for every decor style. These purposely designed pieces are inexpensive and reusable — you can apply the motif as many times as you like. And they remove the headache of having to draw your own stencil, which, unless you’re highly skilled in that department, can be intimidating. For those of you that do have wild imaginations combined with great artistic skills, you can always make your own with some cardboard and a craft knife set. Regardless of the type of stencil you choose (store-bought or handmade), the next question is how do you keep it in place when painting with stencils on wood? For safety reasons, it’s a good idea to choose a peelable spray adhesive which allows you to reposition the stencil as needed and avoid painting your hands.

Prepare Your Wood Properly

Good preparation is crucial to a fantastic finish. Stenciling on wood successfully is largely a matter of preparation and choosing the right mediums. The first step is to check whether the wood is already coated with stain, varnish, or an opaque medium. You want to ensure your chosen paint will adhere to your wood properly. For example, if your project is already stained, you may find that your stencil pattern rubs off over time. Plus, existing stains may mean it’s more challenging to correct any mistakes you make compared to a bare or painted piece. If you’re aiming for a rustic piece, uneven wood with prominent cracks or grain will not be too much of a problem. Although, a significantly uneven surface will make your stencil work prone to bleeding, which could even add to the finish, in an imperfect bohemian manner. However, if this isn’t the look you’re going for, ensure that the furniture is relatively smooth. Too shiny, though, and you will need to sand it a little so your stenciled paint sticks. In the case of cabinet doors, either spray in situ or remove the front pieces. Personally, I would rather take a little more time and remove doors, to give myself an easier run when spraying.

Personal Protection and Preparing Your Workspace

Even though most water-based latex and acrylic coatings emit very little odor, it’s important to ventilate your workspace properly. Sometimes, opening a window or setting up a small fan to keep the air moving is enough. Additionally, when preparing your workspace, make sure the floor and any immovable objects in the vicinity are covered with a dust sheet for protection. Position your piece in the center of the room and away from any walls. Now that you have your working area set up, think about your own personal protection. Wearing coveralls will protect your clothes and cover up any bare skin, which could be prone to irritation from some coatings. You could also consider wearing a respirator, safety goggles, and gloves for the ultimate defense. It may seem like overkill, but accidents can happen and it’s better to be safe than sorry.
using a paint sprayer

How to Stencil on a Wooden Dresser: A Step by Step Guide

Now that we’ve covered the fundamentals of how to paint a stencil on wood, it’s time to get on with the project!

What You Need to Follow This Tutorial

  • Your wooden dresser.
  • A stencil.
  • Coating.
  • Paint sprayer and suitable nozzle.
  • Dish soap.
  • Water.
  • Sandpaper.
  • Bucket.
  • Cleaning cloth.
  • Drop sheets.
  • Stir sticks.
  • Spray adhesive.
  • Personal safety gear.

Step 1: Set Up

1. Choose your workspace carefully. Make sure that it is well ventilated and move any nearby objects out of the way.
2. Lay down your drop cloth.
3. If only stenciling the fronts of the drawers, remove them from the main body of the unit and set them in the center of your drop cloth.
4. Follow the instructions from the coating manufacturer and sand the surface if required.
5. Wipe down the surfaces with a cleaning cloth soaked in dish detergent and water to remove any remaining greasy fingerprints and dust. Allow to dry completely.
6. Read the paint sprayer’s user manual and set up the unit accordingly. Adjust the unit for detail work and for your chosen coating.
7. Before adding the coating to the spray gun, ensure that it is thoroughly mixed for an even color.
8. Put on your safety apparel.

Step 2: Spraying

1. Take your template and add spray adhesive to the back and carefully position it in place. Remember to press down firmly so the stencil’s surface is in contact with the wood — this prevents bleeding (paint seeping under the stencil).
2. Start spraying! Go slowly and proceed with long, slow strokes. This will make sure there are no drips or paint pools in the design.
3. Repeat this process until you have achieved the coverage you want. It’s a lot easier to apply many thin coats than trying to remove too much paint from the stenciled design.
4. Allow the coating to partially dry before you remove the stencil to prevent irritating smudges.
5. Wipe the back of the stencil clean, apply more spray adhesive and reposition. Repeat points two, three, and four as required.
6. Allow the coating to dry completely before handling the furniture.

Step 3: Clean Up

1. As soon as you are done with your stenciling project, clean your paint sprayer. If any coating is allowed to dry in the machine, it could cause irreparable damage.
2. Once the furniture elements are completely dry, slide the drawers back into place or rehang the doors and move the unit to its final home.
3. Gather up the drop cloth and tidy up your protective equipment.

Conclusion

To conclude this guide, let’s have a quick recap. Choose a coating that will adhere well to a wooden surface; latex or acrylic are the most popular choices as they come in a variety of colors and sheens. And choose a paint sprayer that’s suited to detail and touch-up work so you have optimum control over your design. Take the time to prep your wooden piece properly. If you lack the artistic skills to design your own stencil template, there are plenty of unique patterns available online. Don’t forget to pick up some spray adhesive, too! Now that you know the best way to stencil on wood, you’re ready to add some pizzazz to your tired furniture. Have fun and take your time!

How To Stencil On Wood FAQs

Q: What Kind of Paint Do You Use to Stencil on Wood?
The best paint for stenciling on wood is latex or acrylic water-based coatings. These mediums can also withstand the frequent use that wooden doors or drawers get. Plus, water-based latex and acrylic paints don’t emit strong odors and most are safe for use on kid’s items.
Q: How Do You Stencil on Wood Without Bleeding?
To avoid bleeding when stenciling on wood, make sure your template is firmly positioned in place. A good spray adhesive is the best way of doing this as it ensures the stencil’s back is fully coated before setting it in position.
Q: What Color Is Not Good For Stencils?
There is no wrong color when it comes to stenciling on wood. Although, for the best results, choose a color that contrasts nicely with the base color. A good way to check this is to pick up some color charts from your local hardware store.
Q: How Do You Fix a Stencil Bleed on Wood?
If your coating has bled beneath the stencil, it’s easy to fix so long as the paint isn’t dry. Either take a dry, clean cloth or a Q-tip and gently wipe the paint away. Try to make your final wipe go with the grain of the wood for the best results.
Q: Do You Let Paint Dry Before Removing a Stencil?
The paint doesn’t have to be completely dry before you remove the stenci, but it’s a good idea to allow it to dry a little to prevent smudging when you take off the stencil.
Q: How Do I Make My Own Stencils?
If you’re feeling imaginative and you have an idea for a stencil you want to make yourself, it’s not too tricky. Carefully sketch the design onto a sturdy piece of cardboard with a pencil, then place the card on a cutting board and cut it out using a crafter’s knife.