
When it comes to cleaning a paint gun, using the same method for every sprayer and every type of coating is often not the case. Hence, to simplify this task a little, I’ve created this handy guide to remove any mystification — and take you step-by-step through every situation that could arise.
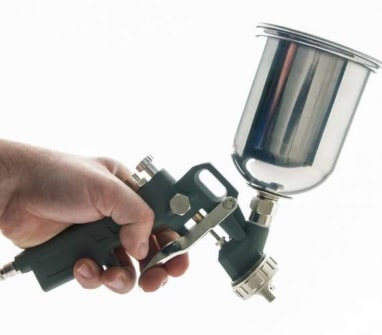
Since cleaning an airless spray gun with an uptake hose is a little different from an HVLP spray gun with a paint cup, I’ve angled these guides toward HVLP machines. For a how-to for airless sprayers, check out further down the page.
How To Clean a Spray Gun Used For Water Based Paint
Let’s start with a relatively straightforward option to get you gently into the swing of things — how to clean a spray gun after use with water-based paints.
When scanning the aisles in your favorite home improvement store, you’ll likely see a plethora of water-based coatings. They can be used for a variety of different projects — from interior furniture applications to exterior walls. While this type of paint is not usually as durable as its oil-based cousin, it is easy to clean and more environmentally friendly.
The best thing about this type of coating is that it only requires water as a base solution to clean up after you’re done for the day — no chemical paint sprayer cleaning solvents required.
What You Need to Follow This Tutorial
- Water.
- Dish detergent (optional).
- Your spray gun.
- Spray gun user manual.
- Cleaning brush.
- Gun wrench.
- Three buckets.
Please note: these are general instructions on how to clean your paint sprayer. For specifics on your machine, take five, grab a coffee and first peruse your user manual.
Method
- Unplug the machine from the power outlet and gently press the trigger — so that any remaining medium in the system is evacuated. Loosen the paint cup and pour any coating left in the container back into the original tin. Then add some fresh water to the container and screw the paint cup back in place.
- Reconnect to the mains power, and pull the trigger while aiming at an empty bucket to clean the suction tube and internals. Repeat the process until the spray of liquid is running clear.
- Disconnect from the power supply once again.
- Fill the two buckets with water (and a bit of dish soap in one always helps — as long as the manufacturer permits).
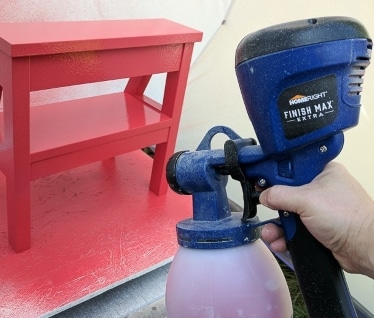
- Once buckets are filled, you’re ready to start disassembling your spray gun. In devices such as the Wagner FLEXiO 5000 this entire process is accelerated due to the clever installment of a bespoke Lock-N-Go system — simply push a button and the unit comes apart.For other machines, for example, the Iwata HVLP Gravity Spray Gun Kit, a gun wrench is included to assist you in loosening all the key components.
- Place the parts in the bucket and leave for approximately one minute — assuming that you haven’t left the coating to dry in the sprayer. If you have accidentally allowed the coating to dry, see the relevant section below.
- Once sufficient time has passed, gently start brushing the individual pieces with a dedicated cleaning brush. Start with the smaller, more fiddly items first (see below for a detailed description on how to clean spray gun nozzles and hoses). Then gradually work up to the larger components.
- Be sure to rinse all parts in the clean water bucket to remove any leftover residue on the sprayer.
- Once you’re sure that all the coating has been removed and that you have a clean paint sprayer, allow it to dry thoroughly before storing the unit away.
Cleaning Oil Based Paint From a Spray Gun
Moving on to oil-based mediums, this is a different story. Oil-based coatings, sometimes known as solvent-based, tend to fall into the old-school style of coatings. Mediums such as oil-based polyurethane, stain, and latex have the advantage of providing a durable finish — that won’t need a touch-up so often.
However, conversely, they’re not so eco-friendly and can release toxic fumes — to the point that some are even banned in certain states. To understand the most up-to-date information, check individual paint manufacturer’s websites — they usually have any state restrictions listed.
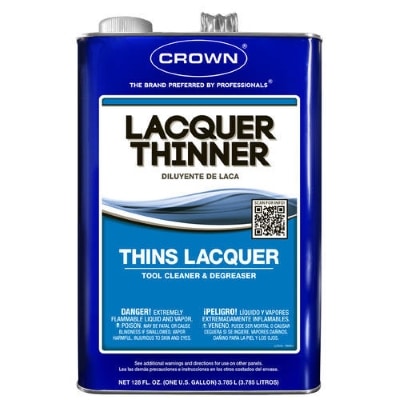
Furthermore, they’re not as fuss-free to clean up after and require a little more attention as you will need to use acetone, mineral spirits, or thinner.
The process for how to clean an HVLP paint spray gun used for oil-based coating is the same as the method described above for cleaning a paint sprayer that’s been used with water-based coatings. The only item that needs to be changed is the water (with optional soap) — replacing it with acetone, mineral spirits, or thinner.
How To Clean Dried Paint From Spray Gun
Whether you’re the forgetful type, easily distracted, or just plain idle, there may be times you leave paint in a sprayer longer than it should remain.
Unfortunately, this could cause the coating to dry in situ — making it harder to remove, which could cause you to procrastinate even more concerning this task.
However, it’s not the end of the world, and you won’t always end up having to invest in a replacement unit — providing you’re careful.
I’m going to focus on removing dried latex paint from an airless paint sprayer in this section as it’s one of the more commonly used mediums in this type of device — although the method can be applied to a variety of other coatings.
What You Need to Follow This Tutorial
- Your airless paint sprayer.
- Soft cleaning brush.
- Two large pails that can be filled with water — to run through the sprayer.
- Garden hose.
- Pliers.
- Paint thinner or mineral spirits — in case the coating just won’t budge.
Step 1 – Cleaning The Nozzle
- Start at the business end — as if the fluid nozzle is blocked with congealed paint, it will be impossible to complete any other cleaning.
- Slightly dampen the tip with your garden hose — this could be enough to encourage the movement of dried remains. Then take your soft cleaning brush and gently scrub away any coating that you can.
- If you’re finding that this is not successful, with extreme care, take the pliers and try to reach into the nozzle and remove any larger chunks of coating. This process needs to be completed slowly so as not to cause irreparable damage to the sprayer.
Step 2 – Cleaning The Filter and Internals
- In many spray guns, there will be a removable filter installed in the handle. Remove this item by unscrewing the handle.
- You’ll likely find that the filter is covered in coating. This is a good sign — it means that it was doing its job before you allowed the coating to dry. However, as it experiences the highest volume of paint, it will also be the hardest to clean. And, if your filter is paint-laden, you won’t be able to flush the system completely.
- Gently brush away any debris that’s held in the filter and rinse thoroughly. To double-check that you have removed all clogs, run water over the filter and notice if it passes through without resistance. If the filter is detritus-free, reinstall and move on to the next step.
- Once the filter is back in place, rinse water through the entire sprayer to clean the rest of the internals.
Step 3 – Priming The Spray Gun With Water
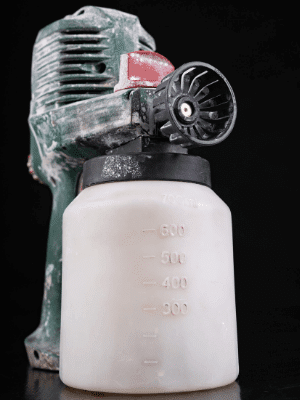
- Take your two pails and fill one with water and leave the other empty — this will be used to spray into. Place the uptake tube into the pail of clean water and set the unit to the prime function. This will ensure that there is no extra coating left inside the sprayer, and it will also give the siphon tube a thorough clean.
- Once the system has primed with water for a few minutes, expel all the dirty water into the empty pail.
- For best results, repeat once more with another bucket of clean water — this extra measure will make sure that no coating is left from the previous pass.
Step 4 – Inlet Strainer
- It’s imperative that you also clean the inlet strainer — situated at the entrance of the uptake hose — as there is a good chance dried coating will be lingering here too.
- Hopefully, the majority of the coating would have been removed with the water priming process, but on the off chance that some remains, gently scrub with a soft cleaning brush.
- Rinsing the inlet strainer thoroughly after step two will ensure that no dried coating will be drawn into the unit when you use the sprayer again.
- Once you’re confident the strainer is clean, you’re pretty much ready to use the spray gun again.
Step 5 – Final Check
- As paint sprayers can be somewhat of an investment, you really want to double-check that all dried coating is removed from the system — since some coating flakes can work their way back into the hose during cleaning the inlet strainer.To verify that it’s completely clean, run more water through the system as a test.
How To Clean a Paint Sprayer Hose
 This wouldn’t be a complete How To Clean a Paint Sprayer guide without focusing on cleaning the spray gun hose.
Hoses are a standard piece of kit found in the majority of airless systems, like the Graco Magnum Pro X7, which features a lengthy 25-foot hose. Finding a brush that could clean this kind of length would be an impossible task. Hence, the bulk of hose cleaning would happen when you flush through the entire system.
This process is thoroughly covered in the above section — how to clean a spray gun with a dried coating.
However, whether you’re a compulsive paint sprayer cleaner or have plenty of time on your hands, you may wish to give your hose an extra once over.
In this case, unfasten the hose from the body of the machine and let it soak in the relevant cleaning fluid for a few minutes. Then, place a funnel on the end of the hose and pour a bucket of your cleaning solution through to rinse.
Once rinsed, wipe down the exterior of the hose and inspect for any signs of wear or damage, then allow to dry before storing.
How To Clean a Paint Sprayer Nozzle
The nozzle or fluid tip is one of the most important parts of a spray gun — it is where all the action takes place, that fine atomization that makes the finish even and superior. So, you’ll need to pay particular attention to it when deciding how to clean your paint gun.
The best way is to completely remove the nozzle from the main body of the spray gun and then dampen it with the relevant cleaning agent. Once it’s slightly moist, gently brush it with a soft cleaning brush to remove any coating build-up, then waggle it in a container of water or thinner — this will ensure that any paint flakes or residing coating are removed.
Allow the tip to dry before resecuring on your spray gun. Then pack the complete unit away neatly in a sturdy storage case — to protect it from dust when not in use.

How To Clean an Airless Paint Sprayer
If you’re using a relatively niche handheld airless sprayer, say for example, the Graco Ultra cordless machine, then you can follow the above section on how to clean an HVLP paint spray gun.
However, as I mentioned earlier, if you’re the proud owner of a somewhat larger unit, for instance, the Titan Impact 740, that section will not work for you. The easiest way for you to maintain your airless companion and ensure that it’s clean is to follow the steps on my how to clean dried paint section above.
While your paint will not be dry (hopefully) it’s the same process, yet should be more rapid, than when working with a caked-on medium.
Paint Gun Cleaning Kits and Stations
If you want to make your paint spray gun cleaner than it ever has been before, a paint sprayer cleaner kit could be a worthwhile solution for you.
Packages like the TCP Global Complete Pro Cleaning Kit include as many as 23 pieces to give your unit the TLC it deserves — and help you get to all those hard-to-reach places. This one in particular arrives with a variety of brushes and cleaning needles — all held together in a convenient storage case.
A spray gun cleaning machine is akin to taking your paint sprayer to a spa — ok, I know it’s a bizarre analogy. These nifty devices take all the hard graft and headache away from the necessary end-of-day maintenance.
In my opinion, the Herkules Paint Gun Cleaner G100 is one of the best spray gun cleaner devices around (also known as a spray gun cleaning station). It can clean one paint container and sprayer, or two spray guns automatically in only one minute. Furthermore, this spray gun cleaner will handle solvent and water-based coatings — as well as hailing from a US-based manufacturer and including a three-year warranty.
Conclusion
When it comes to cleaning a paint sprayer you should now be well on your way to expert level — even if you have left the paint in the unit a little too long.
Whether you decide to opt for an automatic spray gun washing machine (that will do most of the work for you) or a multi-piece cleaning kit (which provides a variety of different sized brushes to allow ample reach), it doesn’t really matter — as long as your unit is paint-free when you’re done.
Hopefully, this comprehensive How to Clean a Paint Sprayer guide leaves you with no questions — but if there is still something missing, check out the frequently asked questions below. And, if this has helped you accomplish the best ever cleaning session of your spray gun, please share it with your friends.
How To Clean a Paint Sprayer FAQs
Q: Can You Clean a Paint Sprayer With Water?
Providing the coating you used is water-based, there is no problem cleaning your spray gun with fresh water.
Q: How Do You Clean a Clogged Paint Sprayer?
If you’re experiencing clogging in your paint sprayer, it’s more than likely down to dried paint flakes. To remove them, check out the how-to above for removing the dried coating.
Q: Can You Clean a Paint Sprayer With Paint Thinner?
Yes, you can. Plus, if you’ve utilized an oil-based coating, then it really is the only way. However, before you start, check the manufacturer’s guidelines to find out if the thinner is compatible with your unit.
Q: What Is the Best Automotive Paint Gun Cleaner?
When it comes to determining how to clean a paint gun that’s been employed for automotive coatings, establish the type of base medium used. Once you have figured this out, then simply follow the directions above for either oil or water-based coatings.
Q: Can I Clean a Spray Gun With Acetone?
If you find that regular paint thinner is not removing the coating from your machine, then you may find that cleaning your paint gun with acetone is your only option. However, exercise caution if using this material as it acts quickly and can be fairly caustic.
Q: Do I Need a Machine To Clean My Paint Sprayer?
While paint spray gun cleaners are a great time-saving device, they tend to have a relatively high price point. However, if you’re a contractor with a fleet of machines, it will significantly ramp up your productivity.


