Dewalt is a well-known brand in the heavy-duty tool industry. They have been present on the market for many years and have managed to accomplish quite a reputation among both DIYers and professionals.
If you ever had an opportunity to discuss quality tools with other people, there is a good chance that someone mentioned Dewalt during the conversation.
However, this is not an article devoted to praising this brand, but instead, it’s a guide that’s designed to help you change the blade on your machine.

Now, it’s not exclusively written for this particular brand, but your experience may vary if you decide to apply this guide to other saws produced by another manufacturer. In simpler words, it should work as a universal guide, but it’s definitely the right one for Dewalt machines.
The Process of Taking the Head Apart
Before you get access to the edge itself, you have to take some things apart. Here are the steps that should explain how to change a miter saw blade, respectively –
Taking off the Shroud
The first thing that needs to get demounted is the protective shroud. You can do the whole process without doing this particular step, but it’s strongly recommended that you don’t skip it due to the potential inconveniences later on in the process.
The whole process is as simple as it can be. All you have to do is unscrew everything that holds the shroud in place. It’s usually a single screw, but there are some models with a couple of points of interest.

Demounting the Blade
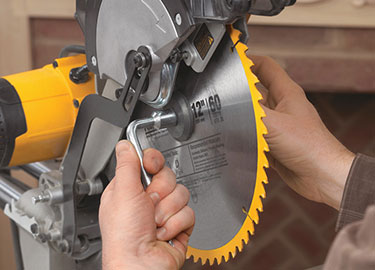
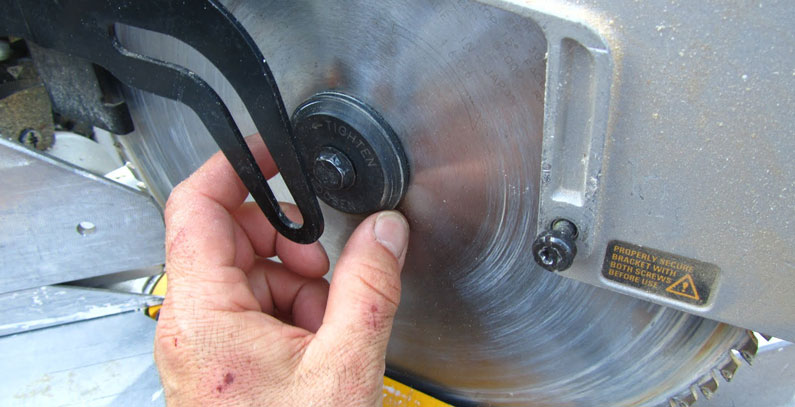
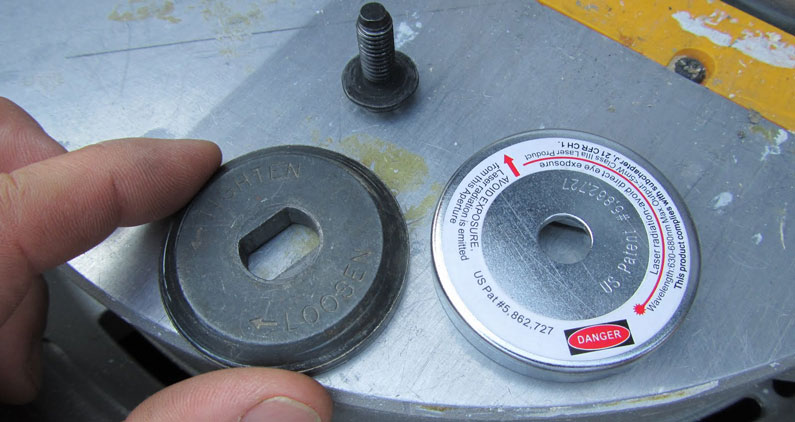
Once you’ve taken the shroud off, it’s much easier to get access to all the screws that hold the blade in its place. There is no particular order you should follow when it comes to unscrewing, but we recommend starting with the supporting screws until the only one left is the one that goes through the blade.
Most modern units feature an index that is parallel to the disc. It’s usually a small button that prevents the axis from rotating and thus unscrewing itself. Before you start unscrewing the blade, find the index and keep it pressed down while you unscrew the main bolt.
More often than not, it should come off without too many issues. In case you do experience some issues, don’t try to solve the predicament with more pressure or strength because it’s not going to work. In fact, you will probably jeopardize the balance of the whole unit by applying more pressure than needed. The problem can usually be solved with some lubricant or WD40.

Installing a New Blade
The installation process is also pretty simple. In fact, it’s everything you’ve done already but in reverse.
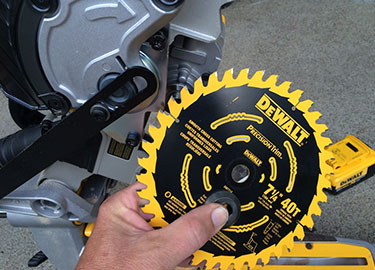
Take the new disc and put it on the axis. Make sure it’s parallel to the index and is at a 90-degree angle. Don’t worry if it’s slightly off, once you screw it in it should level itself accordingly. However, make sure you don’t tighten it too much because it can affect the RPM, balance, and more.
Things You Should be Aware Of
Every time you decide to adjust a power tool, make sure you unplug it first. While it may sound like common sense, you would be surprised by the amount of people that simply forget to do it. Needless to say, it’s a huge safety risk, and you should never mess with a “live” machine, regardless of its power, torque, and etcetera.
While tightening the arbor and mounting the blade in general, it’s recommended that you wear light protective gloves. It’s not a mandatory thing per se, but some discs can be extremely sharp, especially brand-new ones. It’s always good to wear gloves in order to prevent injuries.
Always double-check the main bolt and how tightly it is screwed in. A lot of people decide to hand-screw the main bolt and test-cut immediately after. Even though it doesn’t sound possible, some people do forget to tighten the axis thoroughly, and that can lead to serious consequences caused by imbalance and high RPM output.
Also, before you plug the machine back in; make sure every pin, knob, and levers are tightened and secure.

Possible Issues and Solutions
The most common issue people stumble upon includes faulty screws and bolts. In case the machine hasn’t been used for a while, you may run into screws that are particularly hard to manage due to rust or simply lack of lubricant. As we already said, WD40 is a pretty simple yet effective solution for these situations.
If you don’t have any at that moment, you can use tantalizing grease or any other greasing product that’s made for lubrication of power tools.
Another issue is wobbling. Now, there is a certain level of tolerance included meaning you can leave some space in between the blade and the nut, but it shouldn’t be enough for it to wobble. In simpler words, if you ever notice that the edge isn’t tightly screwed in – react immediately.
Turn the machine off, unplug it from the socket, and try to annul the gap by redoing the whole process again. Remember, it’s always better to do something twice instead of risking your safety due to laziness or ignorance.
The Conclusion
While all of this sounds pretty simple, it does require focus, attention, and a certain level of experience. That doesn’t mean you have to be a professional carpenter in order to change a single blade, but it’s recommended that you refrain from doing it if you absolutely don’t know how to tackle certain mechanical predicaments. Getting the hang of it doesn’t take long; in fact, anyone can do it after some reading and preparation.
Keep thinking about your safety throughout the whole process. It’s the trivial things that usually cause the most damage because people either forget about them or are too relaxed to be bothered. In both cases, the outcome is definitely not favorable.
Always invest in quality blades because that’s one of the most important parts of your tool. If you opt to get a cheap low-quality one, the risk factor increases significantly, and it’s simply not worth the gamble.


